
Castlevania: Belmont's Curse Weapons: Location Guide
Find Castlevania: Belmont's Curse weapons, compare attack stats, track down early upgrades, and follow the unlock routes for Durandal and Vampire Killer.
Jump to
How Castlevania: Belmont's Curse Weapons Work
Castlevania: Belmont's Curse weapons give Rose seven distinct combat styles, from rapid dual-sword attacks to heavy greatsword swings. Learning their mechanics matters just as much as finding a higher attack stat, especially when an upgrade sits behind a platforming challenge. This Castlevania: Belmont's Curse weapons guide covers weapon categories, named equipment, exploration routes, and the steps needed to claim Durandal and Vampire Killer.
Rose’s arsenal includes swords, shields, spears, gauntlets, greatswords, dual swords, and whips. Each category brings its own moveset, while equipment quality determines its attack tier.
| Weapon category | Combat mechanics |
|---|---|
| One-handed swords | The Longsword rewards attacks immediately after a backdash or slide and includes a dash-through action. |
| Sword and shield | Combines sword attacks with the ability to block. |
| Spears | Two-handed weapons with extended reach. |
| Brass knuckles / gauntlets | Weapon damage increases through sustained attacks; Cestus includes an uppercut. |
| Greatswords | Slow, heavy attacks, aerial spinning attacks, and a charged ground attack with a follow-up strike. |
| Dual swords | Rapid spinning attacks that can chain into a follow-up blitz after the opening swing finishes. |
| Whips | Directional attacks with extra damage concentrated at the tip. |
Choose your attacks around those mechanics. Keep enemies near the tip when using a whip, exploit a spear’s reach, and leave enough room for a greatsword’s slower swing. With dual swords, let the opening swing finish before chaining the follow-up.
Across Castlevania: Belmont's Curse weapons, four quality levels organize the attack progression:
| Quality | Attack |
|---|---|
| Ordinary | 25 |
| Refined | 50 |
| Masterpiece | 75 |
| Legendary | 100 |
Those numbers are weapon attack values. Keep the moveset in mind alongside the stat: blocking, reach, and sustained-hit bonuses each change how you approach an encounter.
Relics add another layer by triggering effects through offense and defense. Combine them with your chosen weapon’s mechanics as you discover equipment throughout Paris and the castle.
Official page: Castlevania: Belmont's Curse (konami.com)
Weapon Attack Stats and Locations
Use this Castlevania: Belmont's Curse weapons list to connect named upgrades with their areas. The Longsword is Rose’s starting weapon; the other entries below have specific exploration locations or a story reward.
| Weapon | Category | Attack | Location or acquisition |
|---|---|---|---|
| Longsword | One-handed sword | 25 | Starting equipment |
| Bastard Sword | One-handed sword | 50 | Paris Streets: Justice District Sewers |
| Rusted Harpe and Aegis | Sword and shield | 25 | Holy Innocents Cemetery: Serpents’ Lair |
| Fleuret and Tower Shield | Sword and shield | 50 | Library: Condemned Shelves |
| Lance | Spear | 25 | Holy Innocents’ Cemetery |
| Cestus | Gauntlets | 25 | Paris Streets: Sewer Reservoir |
| Jewel Knuckles | Gauntlets | 50 | Main Hall: Old Gallery |
| Burnt Sword of Fierbois | Greatsword | 25 | Paris Streets: Roof of the Tower |
| Durandal | Greatsword | 75 | Library: Lisa’s Laboratory |
| Pair of Longswords | Dual swords | 25 | Catacombs of Paris: Crossroads of the Dead |
| Rapiers | Dual swords | 50 | Main Hall: Watch Tower |
| Whip | Whip | 25 | Catacombs of Paris: Hall of the Fallen Angels |
| Thorn Whip | Whip | 50 | Library: Fine Arts Shelves |
| Vampire Killer | Whip | 100 | Defeat Death in Notre Dame’s Choir room |
The one-handed sword progression also includes Joyeuse at 75 attack and Valmanway at 100 attack.
Several upgrades share attack values across different categories. Bastard Sword, Jewel Knuckles, Rapiers, Thorn Whip, and Fleuret and Tower Shield all have 50 attack, but their category mechanics differ. Compare the attack pattern you want alongside the number.
For a straightforward stat comparison, Durandal sits at 75 attack against the Burnt Sword of Fierbois’s 25. Within gauntlets, Jewel Knuckles increases the listed attack from Cestus’s 25 to 50.
Find the Bastard Sword, Cestus, Lance, and Jewel Knuckles
Several Castlevania: Belmont's Curse weapons sit behind traversal sequences rather than a simple chest beside the main path. Follow the room landmarks carefully, particularly around grates, whip hooks, and crumbling platforms.
Bastard Sword: Justice District Sewers
Bring Holy Light for this route.
- From Paris Streets: Court of Justice, take the bottom-right exit beside the red door.
- In the docks, drop through the platform and slide into the small opening at the bottom left.
- Continue left into the Justice District Sewers, drop down, and use Holy Light to pass through the stone.
- Swing left between the two moving blades.
- Beyond the two stone pillars, activate the switch with a whip swing.
- Swing back toward the pillars while holding Holy Light. Release it to bounce off the solid pillars and rise above them.
- With the platform lowered, use the overhead whip hooks to reach the chest at the upper right.
The chest contains the 50-attack Bastard Sword.
Cestus: Sewer Reservoir
Start at the Guard Level at the base of the Paris Streets Tower and move right.
On the lower level, break the statue on the left, then head right and slide through the concealed passage. Drop through the grate on the right and cross the wooden platforms toward the chest on the left side of the large room.
Opening the chest raises the surrounding walls and triggers an enemy encounter. Defeat the enemies to leave with Cestus, a 25-attack gauntlet weapon.
Keep attacking when you have a safe opening to use the gauntlets’ sustained-hit damage mechanic.
Lance: Holy Innocents’ Cemetery
Move left from the cemetery fountain and climb the large staircase. Enter the room at the top and activate its switch to begin an enemy encounter.
After winning, move right to the newly revealed wall. Double jump and climb between the walls to reach the space above the room, then head left to the chest containing the 25-attack Lance.
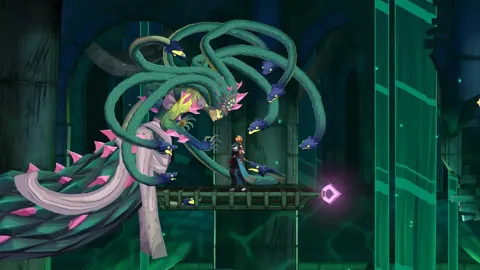
The cemetery also holds Rusted Harpe and Aegis. After defeating Medusa in Serpents’ Lair, leave through the right exit and collect the weapon at the foot of the steps.
Jewel Knuckles: Old Gallery
From the Main Hall: Archives Mirror Room, exit right and whip into the floating mirror above the entrance.
Launch diagonally up and right onto the wooden platform, then enter the next painting before the platform crumbles. Fire toward the candlelit platform on the right, which remains solid, and enter the painting above it.
Launch diagonally up and right when that painting reaches the leftmost point of its sway to avoid the buzzsaw. Cross the crumbling platform, jump right to the lower platform, and enter the painting on the left.
Descend past the buzzsaws to the red-carpet corridor. Head right and drop through the grate beneath the pink anchor point. In the next room, go left, drop through another grate, then move right past the lance enemy.
Climb the stairs into the room on the right. Drop through its central grate, enter the red door, and hit the switch above Rose. The lowered barriers give access to the 50-attack Jewel Knuckles chest.
Library Weapons: Durandal and Fleuret and Tower Shield
Two Castlevania: Belmont's Curse weapons reward a return to the Library’s orb puzzles: Durandal and Fleuret and Tower Shield. Both routes involve aerial movement, while the shield route also requires Holy Light.
How to get Durandal
Durandal is a Masterpiece greatsword with 75 attack. Defeat Carmilla to unlock the air dash before attempting its route.
Return to the Curiosity Cabinet, a couple of rooms to the right of the planetarium. Activate the four-orb constellation in the center of the room by bouncing on its light orbs. Activated orbs grow larger.
You can activate the constellation before collecting its associated notes. If you hit the wrong orbs, land on the nearby ledge or floor to reset the puzzle.
Once the constellation is active:
- Launch upward into the platforming passage.
- Air dash to the next orb and grapple across.
- Land on the weak platform.
- Air dash toward the next group of orbs.
- Grapple onward into Lisa’s Laboratory.
- Open the chest to collect Durandal.
Use the greatsword’s aerial spin or charged ground follow-up where you have room to complete the attack.
How to get Fleuret and Tower Shield
Enter Library: Condemned Shelves through the middle entrance on its left side. Move right and use the ledge to reach the platform level with the large globe.
Bounce on only the bottom four glowing orbs. This reveals a larger orb above the globe. Bounce straight upward from it to uncover the secret area.
Continue upward, then use Aerial Rush to dash left and Holy Light to pass through the stone. At the next orbs, bounce up and land on the right platform without Holy Light.
Launch left while holding Holy Light, then use Aerial Rush to cross the passage. Once directly above the candlestick at its left end, drop straight down to the chest.
Your reward is Fleuret and Tower Shield, with 50 attack and the sword-and-shield category’s blocking ability.
How to Unlock Vampire Killer
Among Castlevania: Belmont's Curse weapons, Vampire Killer is the Legendary whip, with 100 attack. It is awarded for defeating Death in Notre Dame’s Choir room.
Reaching that fight requires the Library, Clock Tower, and Artist quest progression.
| Step | Objective | Reward or result |
|---|---|---|
| Defeat The Occultist | Win the Library boss encounter | Brauner’s Paintbrush |
| Defeat The Builder | Win the Clock Tower boss encounter | Smash |
| Visit Brauner’s Atelier | Break the statue in the Main Hall | Brauner’s Masterpiece Arcana during the cutscene |
| Enter Gallery of Eternal Night | Equip the Arcana and inspect the painting in the room below | Access to Notre Dame |
| Use the Giant Organ | Play the required melodies in the Great Organ Room | Clear Death’s magic from the pipes and open the fight |
| Defeat Death | Win in the Choir room | Vampire Killer |
Complete The Artist Tarot card quest as part of opening the way into Notre Dame. For the organ, follow the melody-sheet hints to clear the pipes.
Level Rose and collect stat upgrades before challenging Death. Once you win, Vampire Killer delivers the whip category’s highest attack value.
Like other whips, it deals extra damage when the tip connects. Enemies killed with Vampire Killer also burst into flames, with a chance to damage nearby enemies. Aim your strikes so the tip reaches your target while keeping surrounding enemies in mind.
FAQ
How many Castlevania: Belmont's Curse weapons are there?
There are 28 weapons across seven categories, with Ordinary, Refined, Masterpiece, and Legendary quality tiers.
What weapon does Rose start with?
Rose starts with the Longsword, a one-handed sword with 25 attack. It gains extra damage when you attack immediately after a backdash or slide.
Can you get Durandal before defeating Carmilla?
Durandal’s route requires the air dash unlocked by defeating Carmilla. Afterward, return to the Curiosity Cabinet and follow the orb-and-grapple route into Lisa’s Laboratory.
How do you get Vampire Killer?
Defeat Death in Notre Dame’s Choir room. Reaching Notre Dame requires Brauner’s Paintbrush, Smash, and completion of The Artist Tarot card quest. Vampire Killer has 100 attack and is the Legendary whip.
Continue with
 Castlevania: Belmont's Curse Alucard's Sword GuideCastlevania: Belmont's Curse Alucard's Sword guide: explore sword weapon types, Alucard Style Costume bonuses, and Rose's combat options before you equip.
More in Weapons
See all WeaponsPopular pages
Castlevania: Belmont's Curse Release Date & Prices
Castlevania: Belmont's Curse release date is October 15, 2026. Compare editions, US prices, platforms, and PC requirements before buying Rose's adventure.
Castlevania: Belmont's Curse Achievements: Full Guide
Track Castlevania: Belmont's Curse achievements with the full trophy list, collectible goals, ending requirements, and a clear route to 100% completion.
Castlevania: Belmont's Curse Collector's Edition Guide
Shopping for a Castlevania: Belmont's Curse collector's edition? Compare Midnight and Night One extras, U.S. prices, and physical bonuses before you buy.
Castlevania: Belmont's Curse PS5: Price & Demo Guide
Castlevania: Belmont's Curse PS5 is out now. Compare editions, check the $29.99 price, explore combat features, and try the free demo before buying a copy.
Join the community
Official channels for news, updates and player help: